2002
April 11, 2002: Spring is here and project #1 turned out to be what I call the West Wall, the rock wall along West Road on the south lawn. The rocks were already there in the form of two huge piles that looked like a wall from the road but were just a large cascading pile sloping down to the lawn. They were on each side of what would become the new wall. I rebuilt the two large piles into one long straight sided wall. The section between the trees is completely new from the ground up. While I was building the wall, Sam was backside, cutting up all the trees Verizon cut down for the new lines. After several consultations with tree people, I learned that firewood was the best use of those trees. It kills me to cut them up. I still have to fill in a bit on the ends of the wall and lay cap stones.

One pile of rocks before building began.

The logs Sammy cut up


 April 15: Billy trimmed the front window on the inside and I gave it two coats of paint and installed a shelf over the top. Major improvement.
April 16: Billy trimmed the kitchen window on the outside. I've put 2 coats of stain on and more is coming.

April 17: CVPS strung new lines today on the new poles. There was no power from 9 to 1 so I left and when I came back I had a hard time getting into work. The temperature was over 90°. Eventually I went out and stacked the cut logs and raked up out there. One of the CVPS guys told me the wood cutters should come back and chip up all the slash. I'll have to rattle someone's cage.
May 3: Zoe died, I buried her next to Ali. No more birds.


Mowzer is always curious but understandably wary.
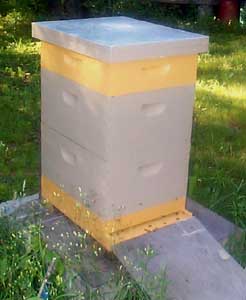
May 8: I opened the hive to check the queen and she was still in her cage and everyone seemed frantic about it. They were all over my hands and trying to sting but I was suited up and impervious. So I removed the candy plug from the end of the cage, fumbling around the mass of bees, trying not to hurt anyone. There was still some stuff in the opening so she couldn't just walk out. Apparently the hole I made wasn't enough. I hope she's out now. I will check in a couple days.

June 24: Making a path around the southern backside of the property, cutting unwanted saplings, planting conifers, transplanting ferns, digging up rocks (and arranging them somewhere, of course). Cleaning up stream bank, dealing with all the slash the treecutters left. Thinking about a tree house. Some of the trees are huge and there is a high canopy.

July 4: Baking! This is the second year of work on the retaining wall along the stream bank. The flood 3 winters ago washed away 5 feet of the bank in front of my shed, leaving only 2 feet in front of the shed door. I got used to climbing down there to get water so decided to build steps into the wall. Neither photo clearly shows the three steps. There is a small ledge at the bottom as well. Still have about a foot to go on the thickest part of the wall (5 ft high) and between 2 to 4 feet in other places.
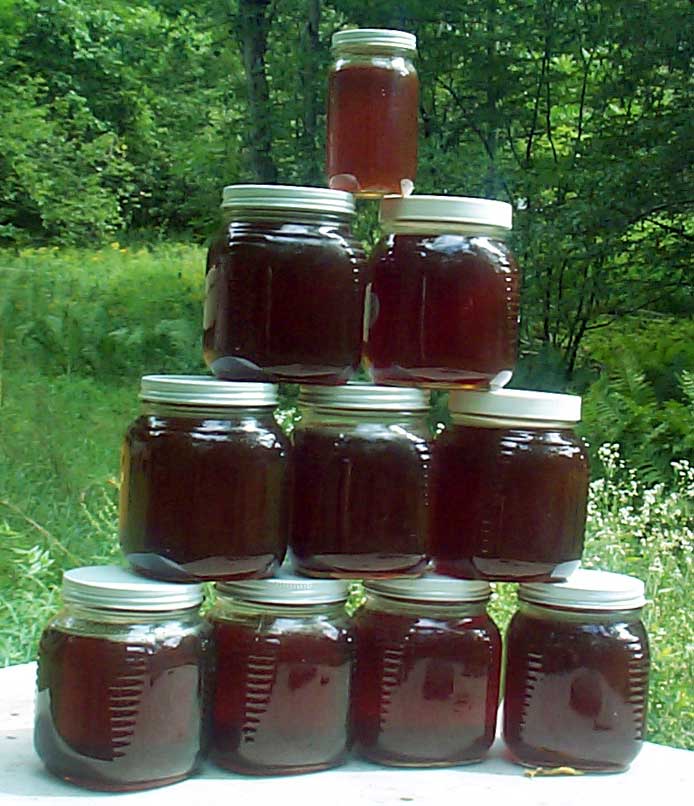
Sept 1: Extracted honey today for the first time ever. 9 1/2 jars, 2 1/2 lbs each, from 7 frames. I borrowed an ancient galvanized extractor but for all its antiquity, it did the job. The uncapped honey spun out easily.

The cappings are sliced off with a hot knife.
 Modern extractors this size are stainless steel with the crank on top and a cover!

Triangle escape board, a one way trip out of the super when it's time to extract. It's put under the super that is coming off a day or two before to clear out the bees. The few that may remain are easily removed with a bee brush.

Smoking distracts them as well as masks the sting scent.

Too many bees to tell if it's finished!

When I pulled off the super to extract it, 2 of the frames were not quite finished so I put them, by themselves, in an empty super and returned it to the hive. After extracting the seven frames and putting that super back on to be refilled, I added the two finished, or nearly finished, frames back in on the outside so I'll extract all nine next time... hopefully in a few weeks after the Goldenrod honeyflow.
Normally I would not be so heavily dressed or even smoke for an operation this simple but these Carnolian bees are aggresive and I'm well over my bee sting quota for the year! After my first "experience" with them, I was planning to requeen with an Italian queen in the spring but now that I've seen how they can produce, I'm not sure I want to do that. These bees severely propolize or "glue" their supers together making them difficult to separate, another downside factor.
Sept 17: Exasperated that I could not galvanize myself to do it, I hired a carpenter to repair/reinforce the rotted sill. So, with that done, I removed the battens and overlapping gable end boards and began piecing it all back together to make a flush wall on which to shingle. "Flush" is a joke. The wall is not square, not plumb and it's bowed. The various types of wood also have different thicknesses. This will be a very inventive shingling job. It would be a miracle if I actually got the whole thing sided before winter, but this is progress.


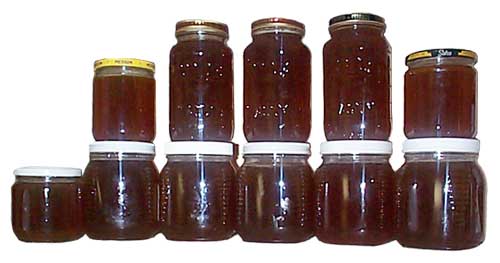
Oct 1: Extracted my second super of honey with Bob Stroffeleno at his place. Bob's been keeping bees for 63 years. There's still another 2½ lb. jar sitting under the extractor honey gate which Bob said he'd drop off here one day. He extracted 204 lbs from his three hives this year. He sells it to a long-standing private clientele. This is goldenrod honey.

Oct 28: The shingles are on up to about 8 feet and the shed around the utility boxes is done except for the doors. I cannot shingle any further now until I've installed the octagonal window in the gable end, a prospect almost as daunting as the sill repair which I hired a carpenter to do. The center where the chimney was is bowed in so I am not working with a flat surface... it's challenging... I use shingles underneath going in all directions to ease the transition which, in some places, is a full ½". I also discovered that the house is not level either. So this wall is not level, not square, not plumb, and it's bowed.

Can't remember exactly when I finished the bridge... sometime in October. Actually, I still have the trim piece to put on the south side (left side in photo). The two dark boards were there before. All the rest are new and will gray like the older two. I may add a center 2x6 span next year. The utility poles are placed so they are directly under the wheels of my car, should I ever feel the need to drive over it.

Nov 8: Today was exceptional. Besides temperatures in the 60's and sunny skies, I installed the octagon window in the south gable end. Now I can glimpse the sun, the moon, the trees, the southern horizon... wonderful. The weather is supposed to stay warm so I am hoping to continue with the shingles. I worked outside in my tanktop all afternoon. A couple weeks ago, Billy installed my new front door and I have to finish insulating with spray foam and then trim it on the inside as well as staining the top trim over the door on the outside.

Nov 20: After a week of snow and freezing rain, power and phone outages, today was sunny and warm, in the 50s, so I got on a few more shingles and made the drip edge for over the window.

Very little left to do but OK as is for the winter.

Nov 27:The view from inside

December 2: My new (to me) buffet and hutch was made in Townsend, Vermont
